Exploring the Demo Portal
The Open Inventor Demo Portal is a collection of 3D visualization programs that run natively “in the Cloud” on an Amazon AWS server and display in your web browser with no additional client software. These programs highlight some of the powerful visualization and image processing features available in the Open Inventor toolkit and demonstrate the performance of our RemoteViz image streaming toolkit. You can use these toolkits to create your own web applications or reimplement your existing desktop technology as a Cloud-native application.
If you’re ready to try some demos, go ahead and click here!
But if you have a few minutes, in the rest of this article we will explain how to get the most value from your Demo Portal experience. Finally, we will summarize the value of Cloud-native applications and how Open Inventor will help you provide your users with the best possible visualization, image processing, and image streaming.
What do you need to use the Demo Portal?
All you need is an HTML5-capable web browser. Our RemoteViz image streaming toolkit supports Google Chrome, Firefox, Microsoft Edge, and Apple Safari on any platform. Images are streamed directly into the browser with no client software installation required. RemoteViz supports both video compression and image compression and takes advantage of your browser’s built-in support for decoding the image stream. No graphics hardware is required on the user’s machine. Keyboard, mouse, and touch inputs are efficiently forwarded to the application.
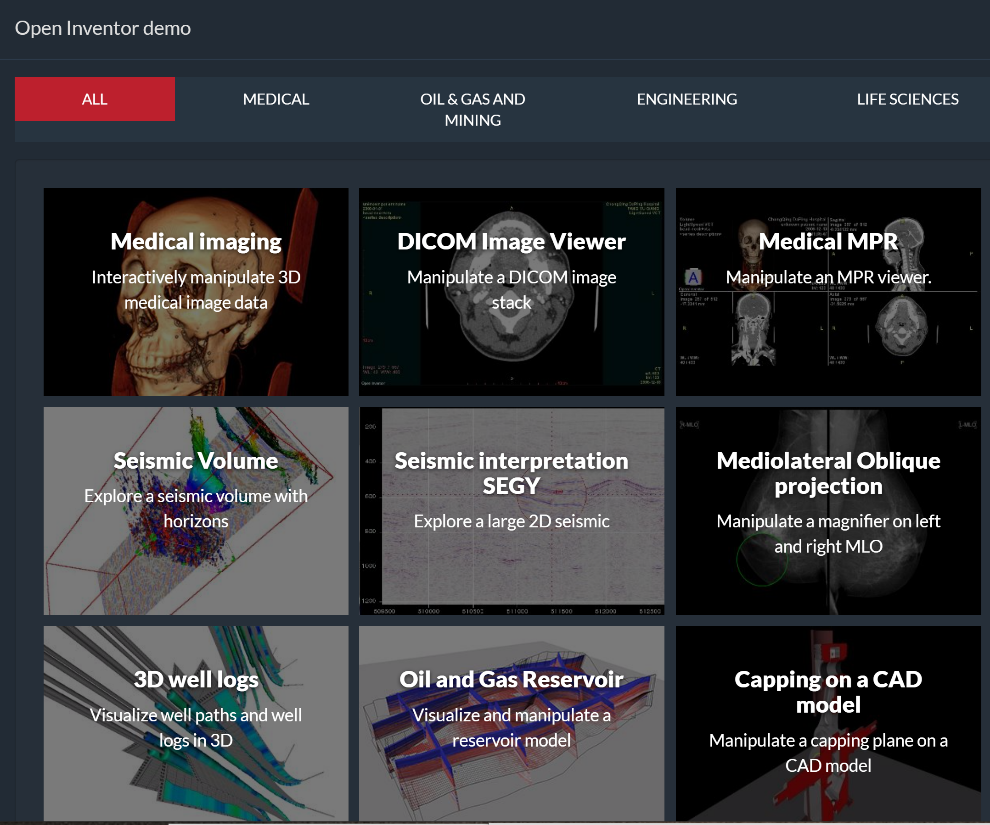
Demo Selection
The first thing you will see on the Portal is the demo selection panel (shown here). For each demo, there is a title, a short description, and a thumbnail image. You can use the buttons across the top to filter the demos by market, for example, to see only oil&gas or medical-related demos. Click on a demo, for example, the MedicalMPRViewer, to get started.
Help panel
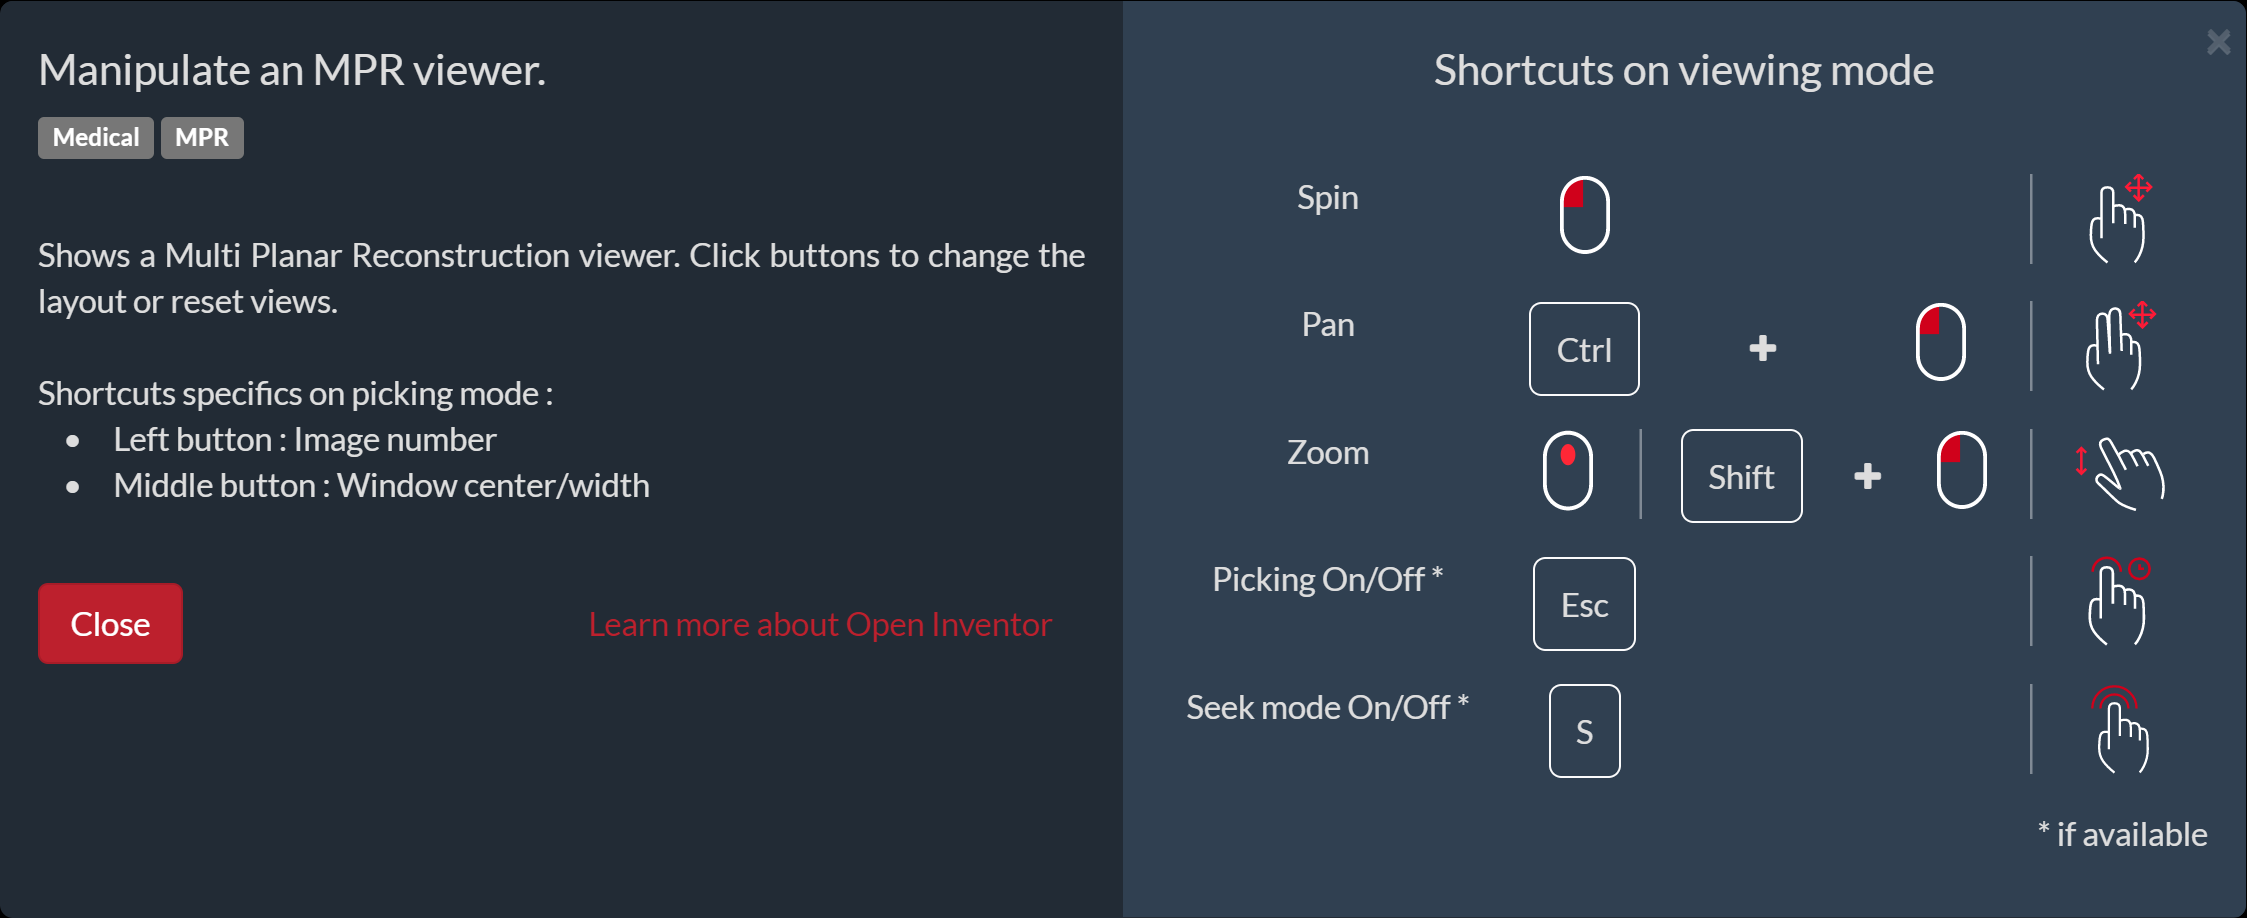
The selected demo will immediately display its Help Panel. While the demo is starting and loading its data, take note of the demo’s viewing actions and special features. All the demos have separate viewing and interaction modes indicated by the “hand” and “arrow” cursors respectively. Generally, the demos start in viewing mode. The MedicalMPRViewer panel is shown here. On the right-hand side it shows that, in viewing mode, the mouse buttons (or touch) can be used to rotate, pan, and zoom the displayed image. On the left-hand side it explains the purpose of the demo and notes that, in interaction mode, you can click and drag with the left mouse button to change the image number and with the middle mouse button to adjust brightness and contrast (window level and width). You can remove the Help Panel at any time by clicking the “Close” button. While the demo is loading a spinning animation is displayed.
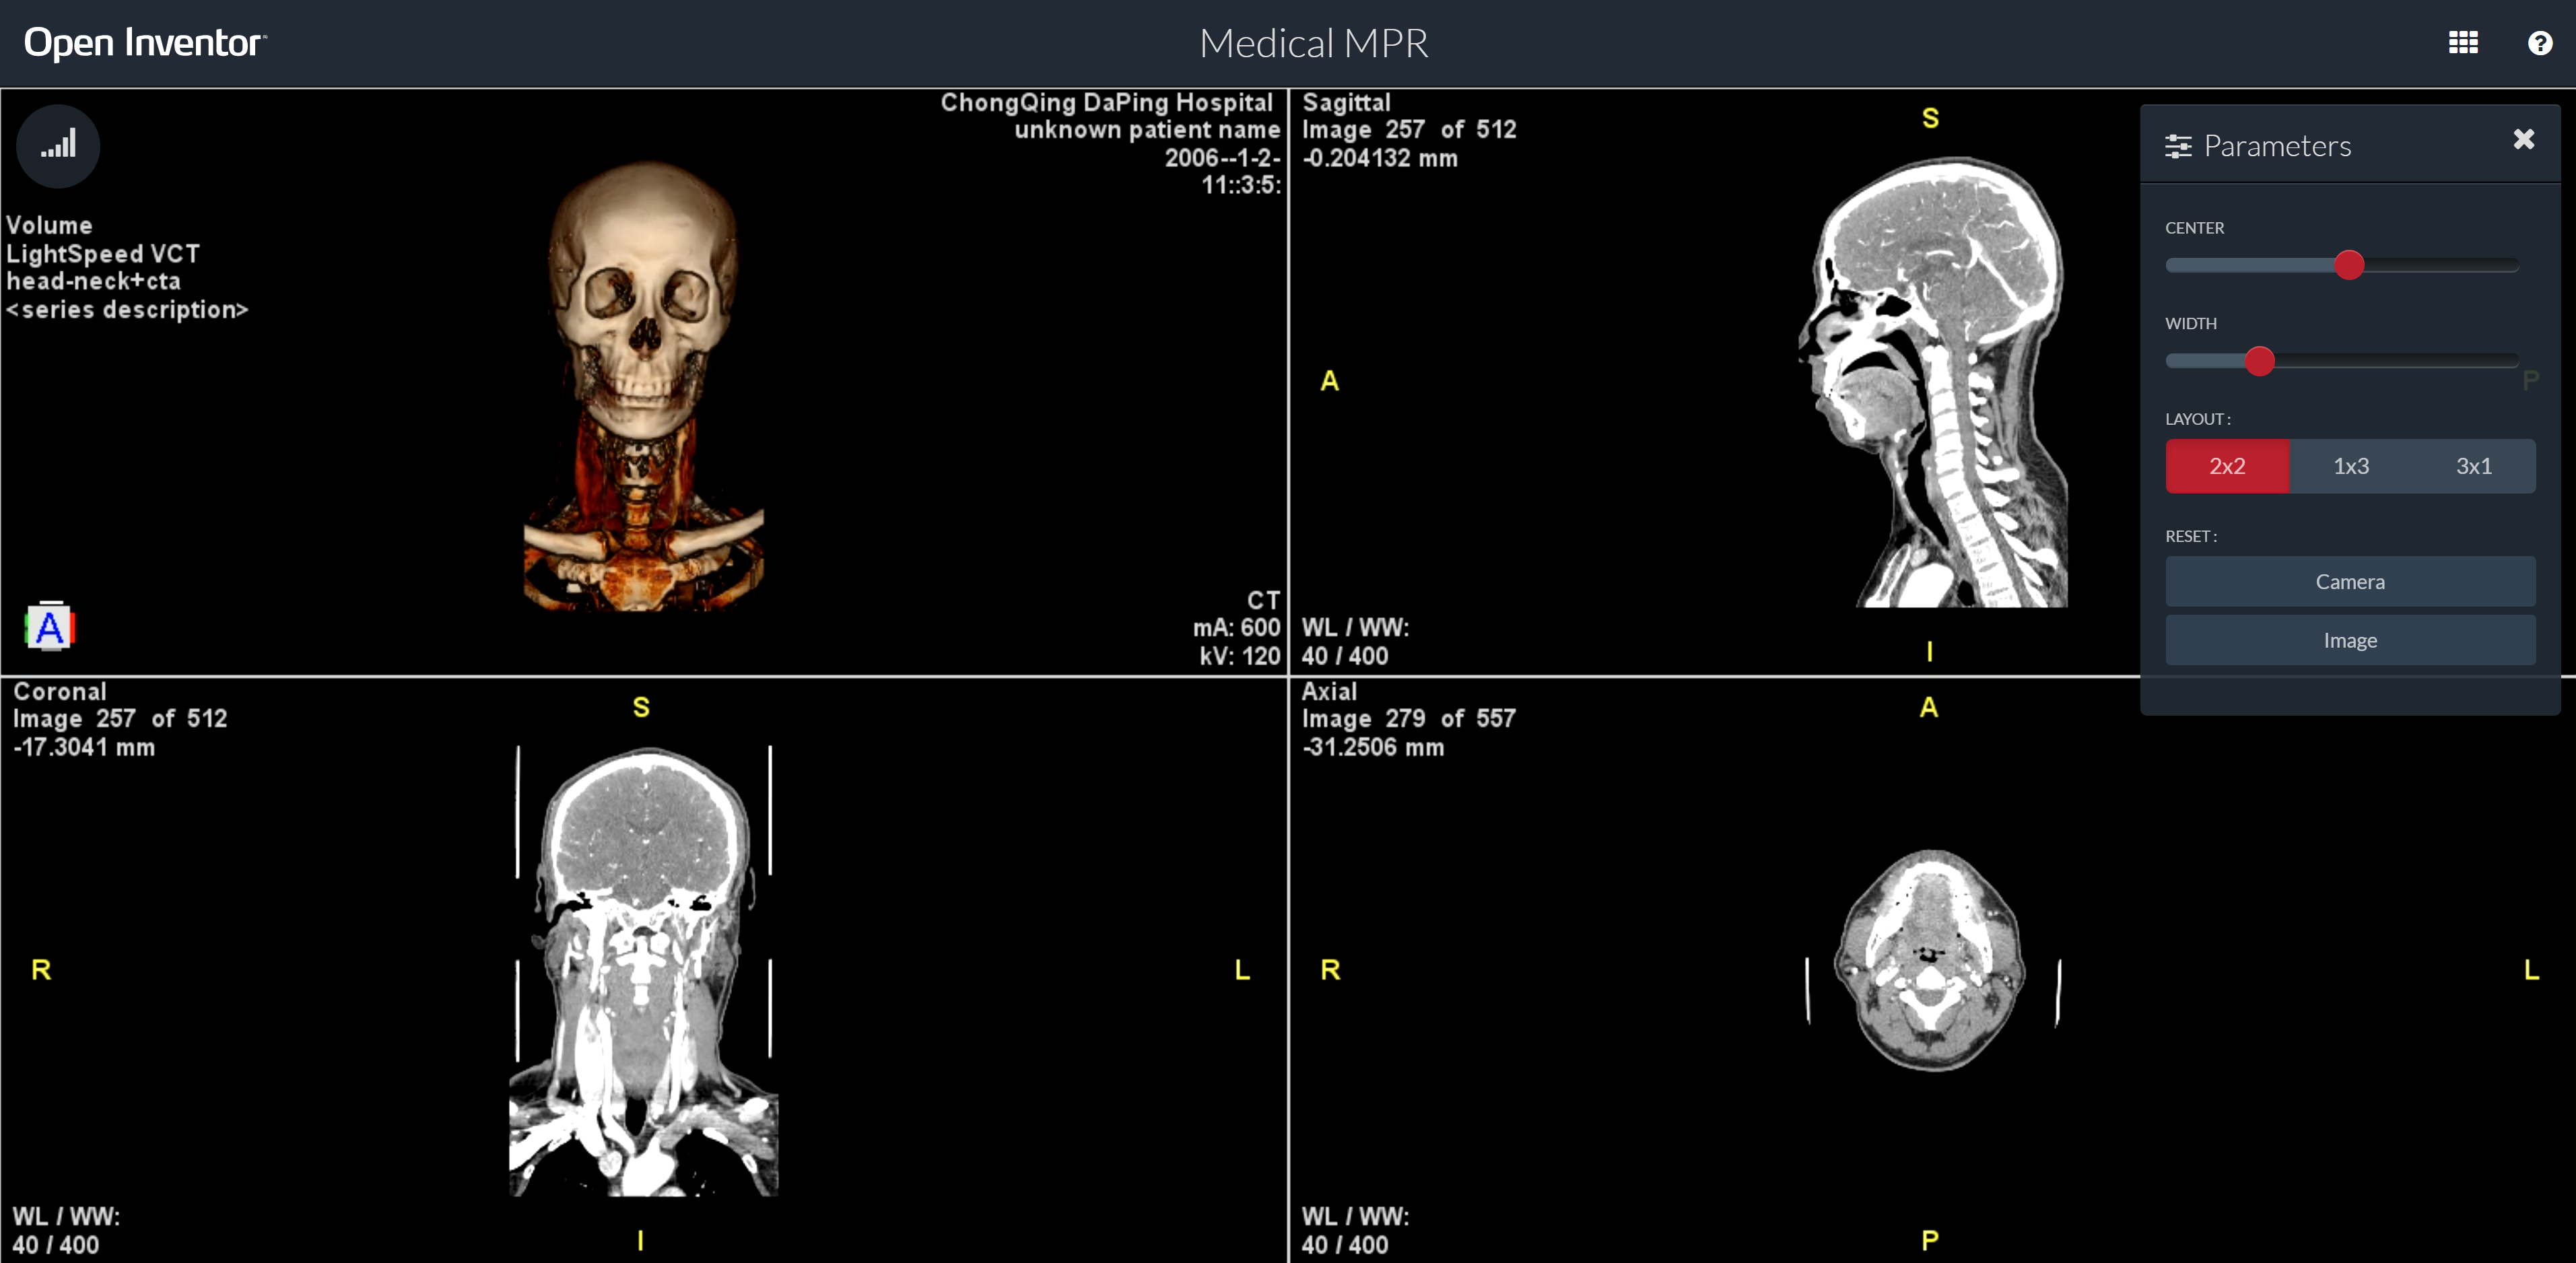
Parameters panel
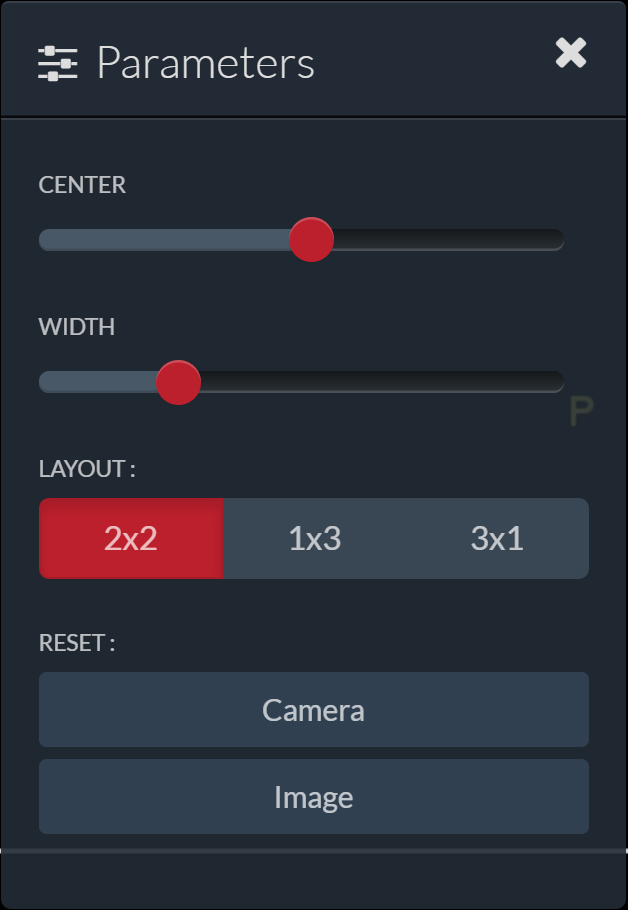
Most demos display a Parameters Panel on the right-hand side of the window. These are just an example of what your user interface could look like. RemoteViz works with any web framework or user interface toolkit. The Parameters Panel allows you to try Open Inventor visualization features and demonstrates how users can interact effectively with the 3D scene. RemoteViz provides convenient tools for your client-side code to send and receive messages from the visualization service. You can hide this panel at any time by clicking the “X” button in the top-right corner.
The MedicalMPRViewer panel is shown here. In this panel, you can change the brightness and contrast settings (window level and width) for the 2D image views using the sliders. You can change how the 2D and 3D views are displayed using the Layout buttons. In this case we are displaying four “viewports” in a single RemoteViz render area. All the viewports are rendered using a single visualization service and sent using a single RemoteViz image stream. Managing the layout of multiple viewports is easy using Open Inventor classes. But RemoteViz can also display multiple render areas in the same browser tab and those views could be rendered by different visualization services. Finally, you can reset the view and/or window values using the bottom buttons.
Viewer buttons
Some demos display a button bar at the bottom of the window. Again this is just an example of a user interface element that your application could provide. Here the “hand” button selects viewing mode, the “arrow” button selects interaction mode, the “seek” (target) button enters a mode where you can click on an object in the scene to automatically zoom in, and finally, the “home” button resets the scene camera to its initial state.

Connection Panel
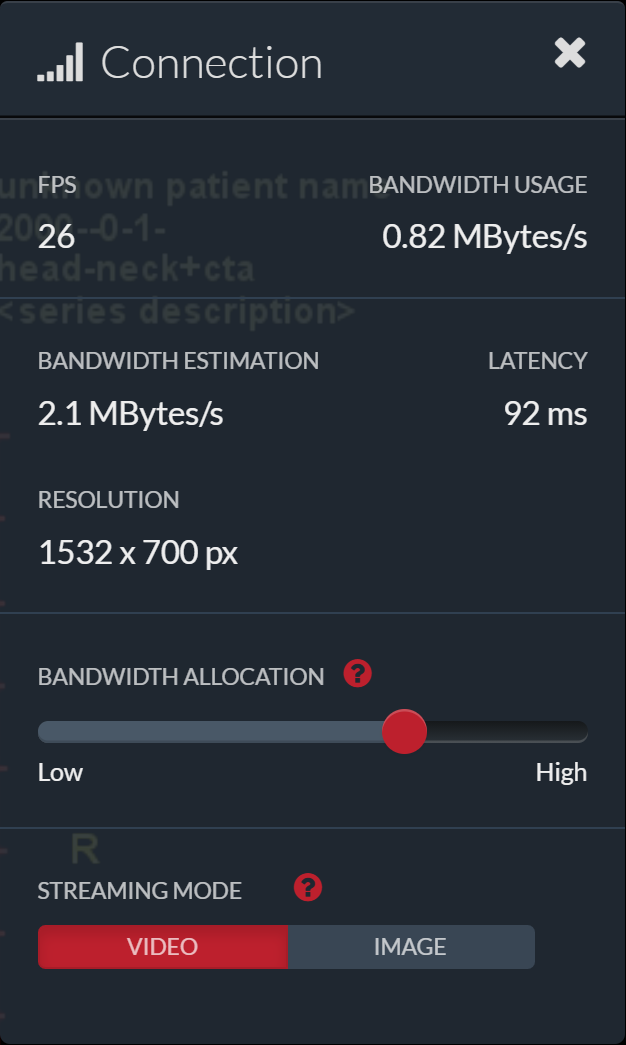
Click the button in the upper left corner to display the Connection Panel. Here you can see how well the RemoteViz image streaming is performing and experiment with some parameters. In this example, the first line shows that we are providing the user with excellent interactivity at 26 frames per second while using less than 1 Megabyte per second of the available bandwidth. RemoteViz can provide acceptable performance with as little as 1 Megabit of bandwidth. If necessary, RemoteViz will automatically adjust the compression parameters to maintain performance while the user is interacting (for example moving the camera) and return to full quality images when the user is not interacting.
The middle section of this panel displays the (estimated) available bandwidth and latency on the current connection. It also shows the current size of the images being streamed to the browser. The bandwidth allocation slider is provided to allow you to simulate the effect of temporary network congestion (this would not normally be displayed to an actual end-user). Moving the slider to the left you may notice that performance and image quality are reduced while interacting, but also notice that the bandwidth usage (top line) is also reduced.
The bottom buttons allow seeing the effect of using video or image compression on the image stream. Generally, video compression gives the best results because codecs like H.264 take full advantage of similarities between consecutive frames of rendering. Image compression is applied to each frame independently. When possible, RemoteViz takes advantage of hardware accelerating encoding and decoding. For example, H.264 video encoding can be done very efficiently by NVIDIA GPUs on the server.
For Example: MedicalMPRViewer Demo
In the MedicalMPRViewer upper left view, you can see the high-quality volume rendering provided by Open Inventor. But Open Inventor also works well for 2D views, annotation text, selection, measurement tools, and other requirements of visualization applications.